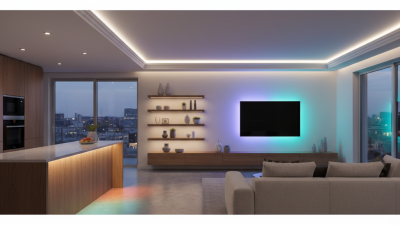
24V LED Strip Lighting Tips for Easy Installation and Energy Efficiency?
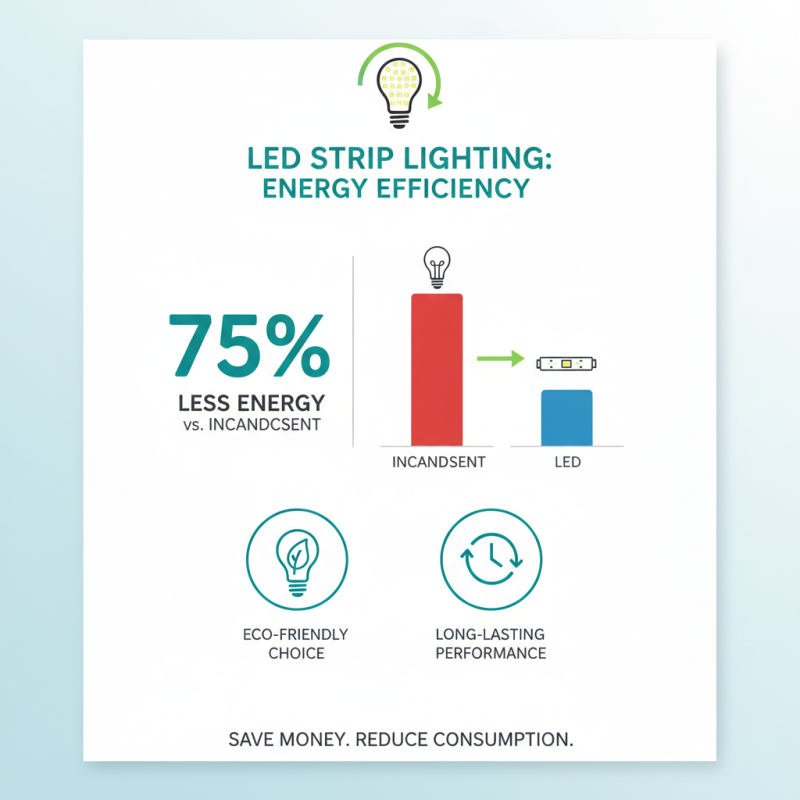
The rise of 24V LED strip lighting has transformed the way we approach home and commercial illumination. According to recent industry reports, LED lighting can use up to 75% less energy than traditional incandescent bulbs. This remarkable efficiency results in measurable savings for both residential and business users. For example, businesses often see lower energy bills by switching to 24V LED strips, making it an attractive investment.
Installation remains a key consideration. While 24V LED strip lights offer great benefits, improper installation can negate these advantages. Many users struggle with wiring and placement. Studies indicate that nearly 30% of LED installations could be improved with better planning and understanding. Users should consider factors like heat dissipation and power ratings during setup, as these can affect performance and longevity.
The potential for innovation in 24V LED technology is significant. However, the learning curve for effective usage still exists. Many casual users underestimate the detailed requirements for optimal performance, such as the importance of using compatible driver units and temperature management. In summary, mastering the installation of 24V LED strip lighting remains a crucial step for achieving energy efficiency and maximum visual appeal.
Choosing the Right 24V LED Strip for Your Project
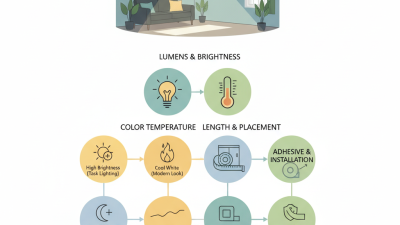
When selecting the right 24V LED strip for your project, consider brightness, color temperature, and length requirements. LED strips typically come in various options, including warm white, cool white, and RGB colors. According to a recent report, using the right color temperature can significantly impact mood and productivity levels.
Brightness is measured in lumens. Research shows that a warm white strip (2800K) emits around 250-300 lumens per meter. In contrast, cooler tones (6000K) can exceed 450 lumens. This can make a substantial difference in your space. Shorter strips might not deliver the desired output or coverage.
Tips: Always check the voltage rating. Only use strips rated for 24V to ensure efficiency and longevity. Use connectors that match your strip model. If unsure, consult an expert. Also, consider dimmable options for versatility. Installing a dimmer switch can enhance energy efficiency by allowing users to adjust brightness based on the time of day.
Some projects may require extensive lengths of LED strip. Ensure you have enough power supply to support all segments, as underpowered setups may dim or fail. It’s essential to strike a balance between length and brightness. Too long of a run without adequate power can lead to voltage drop problems. Reflect on your design needs carefully before installation.
Essential Tools and Materials for Installation
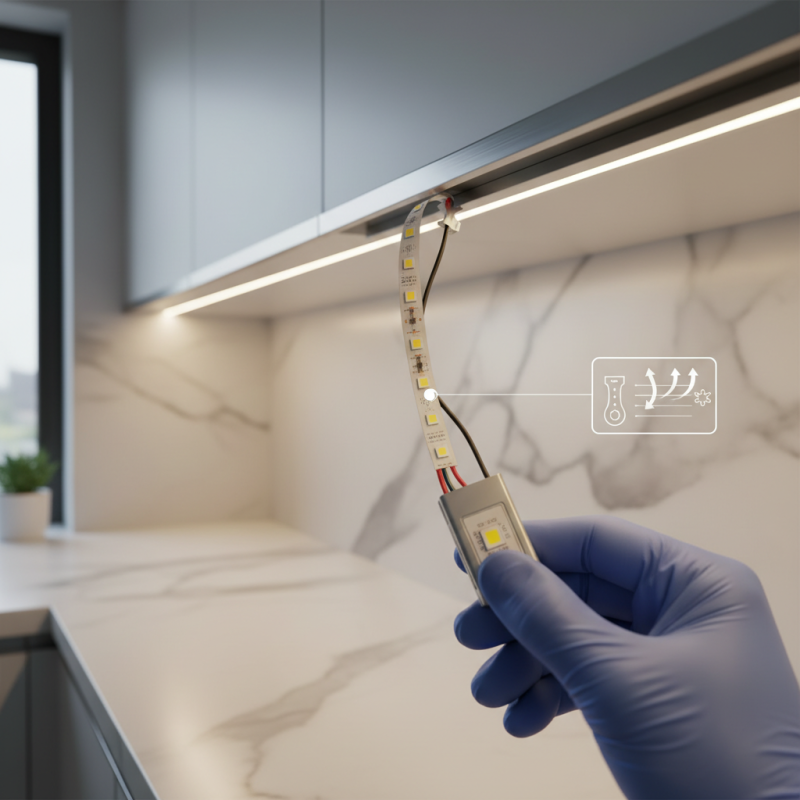
When planning to install 24V LED strip lighting, having the right tools and materials is crucial. Start with basic tools like a measuring tape and a utility knife. These help ensure your cuts are straight and precise. A soldering iron can be useful for connecting strips. If you prefer, connectors can save time and effort.
Don’t forget adhesive backing for the strips. Make sure the surfaces are clean before installation. This can prevent peeling and ensure a strong bond. Consider using a power supply that matches your LEDs. An inadequate power source can cause dim lights or flickering.
While working, create a tidy workspace. Clutter can lead to mistakes, especially with wiring. It’s easy to misplace small components. If errors occur, double-check connections. Take your time. Rushing can lead to bigger problems down the line. A little extra care now saves headaches later.
24V LED Strip Lighting Energy Efficiency Comparison
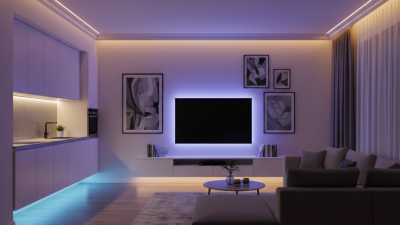
Step-by-Step Guide to Installing 24V LED Strips
Installing 24V LED strip lights can be straightforward with the right steps. Begin by gathering essential tools. You’ll need a measuring tape, wire cutters, and connectors. Measure the area you plan to light. This will help you cut the LED strips accurately. Make sure to consider the placement of the power source and any obstacles.
In terms of energy efficiency, 24V LED strips generally offer better performance than lower voltage options. According to recent industry studies, 24V systems can run longer distances without voltage drop. This leads to more uniform lighting and reduced energy waste. Many installations make the mistake of underestimating the importance of a proper power supply. Select one that meets the total wattage requirement of your strips. This ensures optimal brightness and longevity.
During installation, use the adhesive backing carefully. Press firmly to avoid peeling. If the surface is uneven, consider using a channel or aluminum profile. This can improve both aesthetics and thermal management. Regularly check the installation for any flickering or dimming. These issues might indicate an improper setup or power supply concerns. Small details matter. Review your work periodically to ensure everything works as intended.
24V LED Strip Lighting Tips for Easy Installation and Energy Efficiency
| Tip Number |
Installation Tips |
Energy Efficiency |
Estimated Lifespan |
| 1 |
Use appropriate power supply voltage and capacity. |
Opt for LED strips with higher lumens per watt. |
Up to 50,000 hours |
| 2 |
Clean the surface thoroughly before installation. |
Choose warm white for living areas, cool white for workspaces. |
Up to 50,000 hours |
| 3 |
Plan the layout to minimize cuts and connectors. |
Install dimmers for adjustable light levels. |
Up to 50,000 hours |
| 4 |
Use connectors for easy installation rather than soldering. |
Choose high-quality LED chips. |
Up to 50,000 hours |
| 5 |
Ensure proper ventilation to avoid overheating. |
Consider using motion sensors for automatic adjustment. |
Up to 50,000 hours |
Energy-Saving Tips for Optimal LED Performance
LED strip lighting is a popular choice for both ambiance and functionality. However, ensuring energy efficiency requires careful consideration. Studies indicate that LEDs use up to 75% less energy than traditional incandescent bulbs. This significant reduction makes them a prime choice for energy-conscious consumers. When installed correctly, they provide long-lasting performance.
To maximize energy savings, select the right voltage. A 24V LED strip is ideal for longer runs. It reduces the risk of voltage drop, which can diminish light output. A data report from the U.S. Department of Energy highlights that lower voltage systems lead to less energy waste. Additionally, layering your lighting can enhance the effect without overusing strips.
Another practical tip is to implement dimmers. Reports show that using dimmers can save up to 20% more energy. This can create adjustable ambiance in any space. It allows users to customize brightness based on their preference. However, it’s essential to ensure that the dimmer is compatible with the LED strips. Incompatibility can lead to flickering and reduced lifespan, a common issue many face. Experimenting with layouts and configurations may take time, but finding the optimal setup is worth it.
Troubleshooting Common Installation Issues
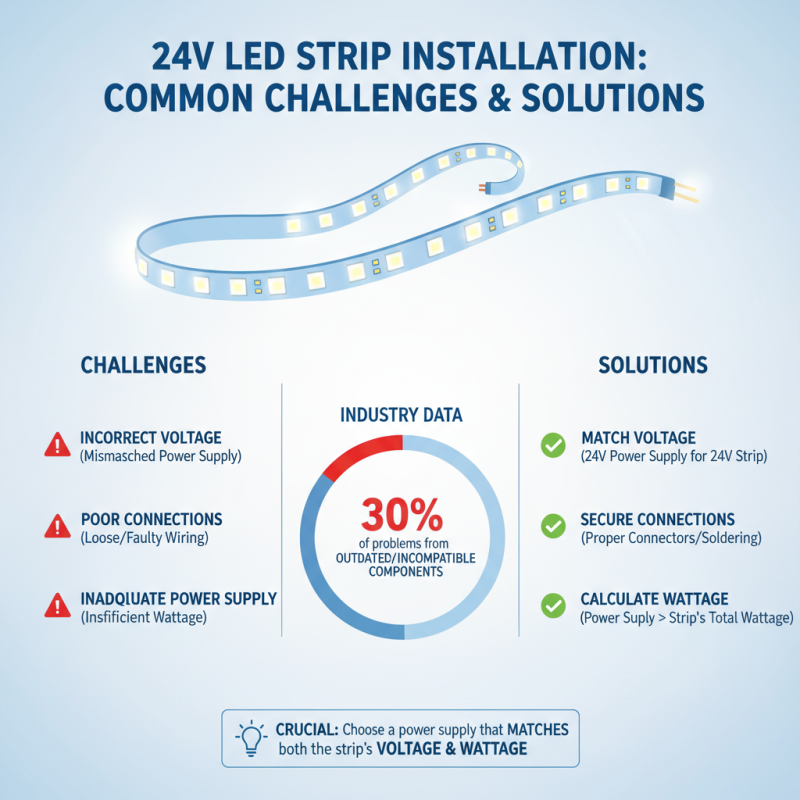
Installing 24V LED strip lighting can transform a space, but challenges often arise. Common issues include incorrect voltage, poor connections, and inadequate power supplies. According to industry data, 30% of installation problems stem from using outdated materials or incompatible components. Choosing the right power supply is crucial; it should match the strip's voltage and wattage. A mismatched power supply can lead to flickering lights or even failure.
Sometimes, connectors do not fit well. Loose connections can cause strips to dim or flicker. Using high-quality connectors can reduce these issues significantly. Furthermore, ensuring proper soldering techniques can create robust connections. Many installers miss this detail, which can lead to future repairs. A report from the LED Industry Association notes that 25% of installations require rework due to faulty wiring or connection mistakes.
Proper planning is necessary to troubleshoot effectively. Design your layout carefully before you start. Measure lengths accurately. Inadequate measurements lead to extra cuts or wasted materials. It's easy to overlook this, but planning can save time and resources. Stay organized and monitor your steps closely. Reflect on each phase of the installation process for a smoother experience in your next project.